Using a Keysight E5061B ENA Vector Network Analyzer
PD1000A Control Software version Rev.2.5 supports the Keysight E5061B ENA Vector Network Analyzer as well as the E5080A/B ENA. This chapter describes how to perform S-parameter measurement with E5061B using PD1000A.
Keysight’s E5061B is a popular network analyzer because of its low frequency coverage which is good for material characterization. The accuracy is not necessarily as good as the E5080B but the performance is good enough for power semiconductor characterization.
The following are the operation differences from E5080A/E5080B. All the others are the same or similar to E5080A/B.
- E5061B doesn’t have CAL wizard. When performing measurement with ‘Reset VNA before measurement’ box checked, the ENA doesn’t show the wizard. User has to perform CAL without having the CAL wizard.
- Minimum frequency of E5061B is much lower than E5080A/B. The ‘Start Frequency’ in the PD1000A software has ‘kHz’ as a unit. It is necessary to convert the start frequency to ‘kHz’ when entering value in the PD1000A software. (e.g. If 100Hz is used as the start frequency, “0.1” must be entered in the ‘Start Frequency (kHz)’ field.
Operation Flow
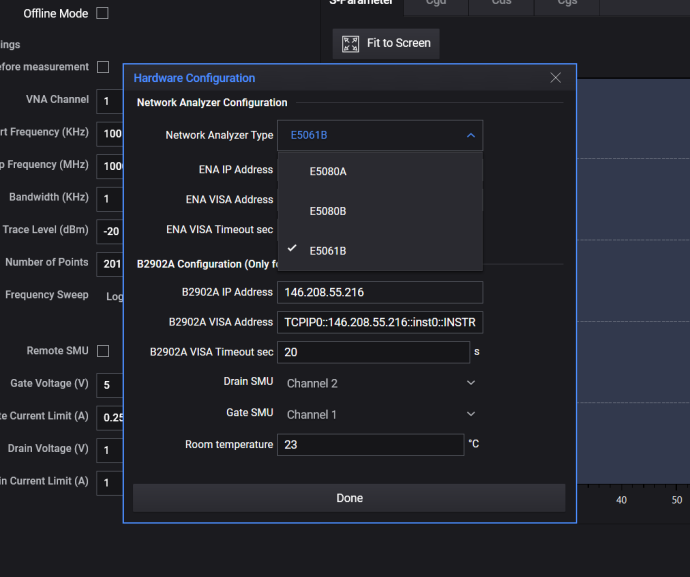
Hardware Configuration
In the Hardware Configuration menu, select E5061B as Network Analyzer Type from the pull-down menu as below.
Calibration and Measurement Flow
Calibration should be done prior to measurement. Perform calibration as follows:
- After starting measurement from PD1000A software if you check Reset VNA before measurement box
or
- Before starting measurement from PD1000A software if you uncheck Reset VNA before measurement box.

CAL and measurement flow with Reset VNA before measurement box ON
- Click START button on PD1000A software with Reset VNA before measurement checked.
- It is up to you if you use the B2902 SMU or not. If you use it, check Remote SMU box on the PD1000A software.
- A Calibration Check window opens on PD1000A software as shown below. The PD1000A software resets the E5061B. However, unlike the E5080A/B ENA, the calibration wizard does not appear on E5061B VNA’s screen.

- Perform the calibration procedure described below on the E5061B. The calibration sequence is not fixed. The following sequence is just an example. You can perform open/short/load/thru calibration for port 1 and port 2 in any sequence as long as you perform all of them. Calibration data should be saved to E5061B if you want to use it later.
Refer to “Step 3. Calibrate the Fixture” for information on installing the Cal standards in the Test Fixture.
Notice the flow is different from the E5080A/B; using a CAL standard (e.g. Open standard) for port 1 and port 2 in sequence is more efficient than changing CAL standard (e.g. Open ® Short ® Load) for a single port.
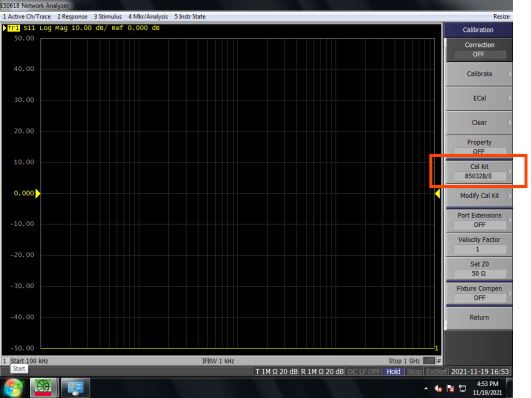
- Push Cal button on the E5061B front panel.
- Select Cal Kit / 85032B/E soft key on the E5061B touch screen.
-
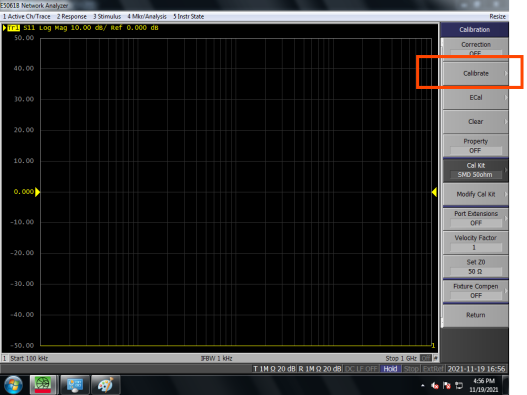
- Select SMD 50ohm soft key
.
- Select Calibrate.
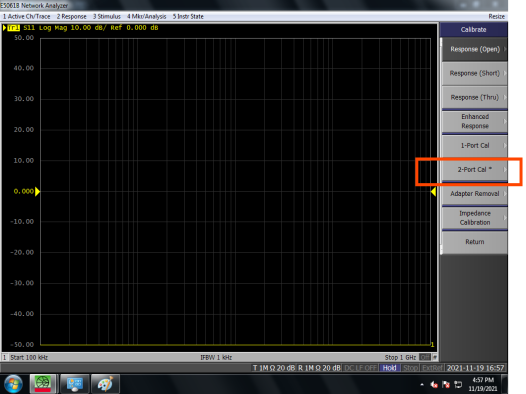
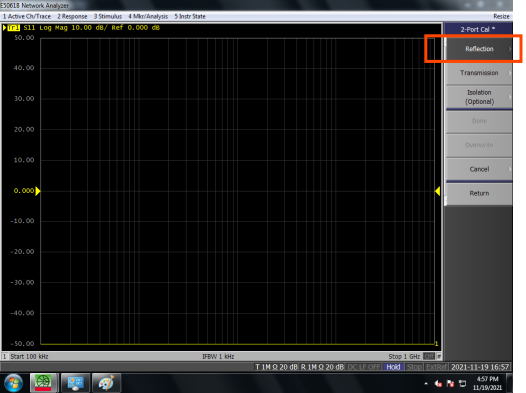
- Select 2-Port Cal soft key.
- Select Reflection soft key to perform Open, Short, and Load calibration for both port 1 and port 2.
- Insert Open standard to test fixture for port 1 open calibration. Connection is the same as E5080A/B.
- Select Port1 Open soft key. You will hear a short Beep sound when port 1 open calibration completes.

- Remove Open standard from port 1 and then insert it in port 2.
- Select Port2 Open soft key. You will hear a Beep when the port 2 Open calibration completes.
- Remove the Open standard and insert Short standard in the test fixture for port 1.
- Select Port1 Short soft key. You will hear a Beep when the port 1 Short calibration completes.
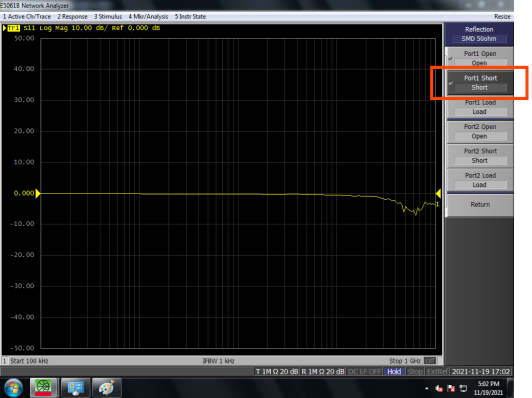
- Remove the Short standard from port 1 and then insert it in port 2.
- Select Port2 Short soft key. You will hear Beep when the port 2 Short calibration completes.
- Remove the Short standard and insert Load (or 50 Ohm) standard in the test fixture for port 1.
- Select Port1 Load soft key. You will hear Beep when the port 1 Load calibration completes.
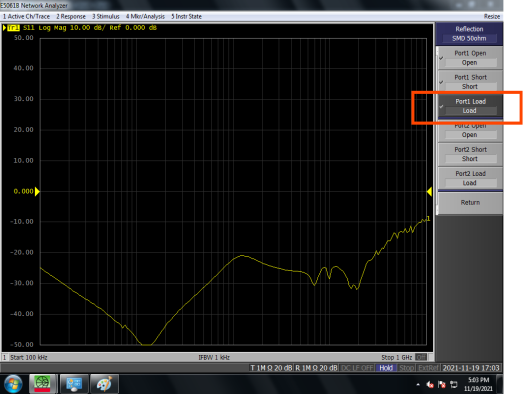
- Remove Load standard from port 1 and then insert it in port 2.
- Select Port2 Load soft key. You will hear Beep when the port 2 Load calibration completes.
- Select Return soft key.
- Remove Load standard and then insert Thru standard between port 1 and port 2.
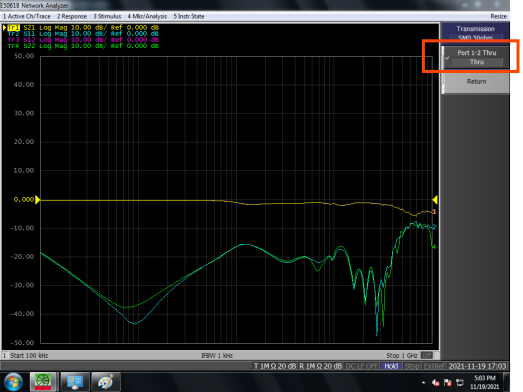
- Select Transmission soft key.
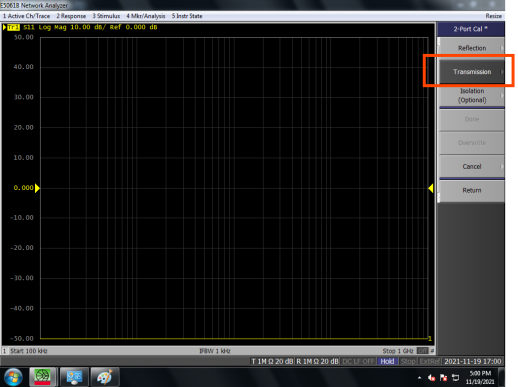
- Select Port1-2 Thru / Thru soft key. You will hear a Beep when the Thru calibration completes.
- Select Return.
- Select Done. The E5061B calibration is complete.

- Insert DUT to the test fixture after detaching Thru standard.
- On the PD1000A software, click Continue button.
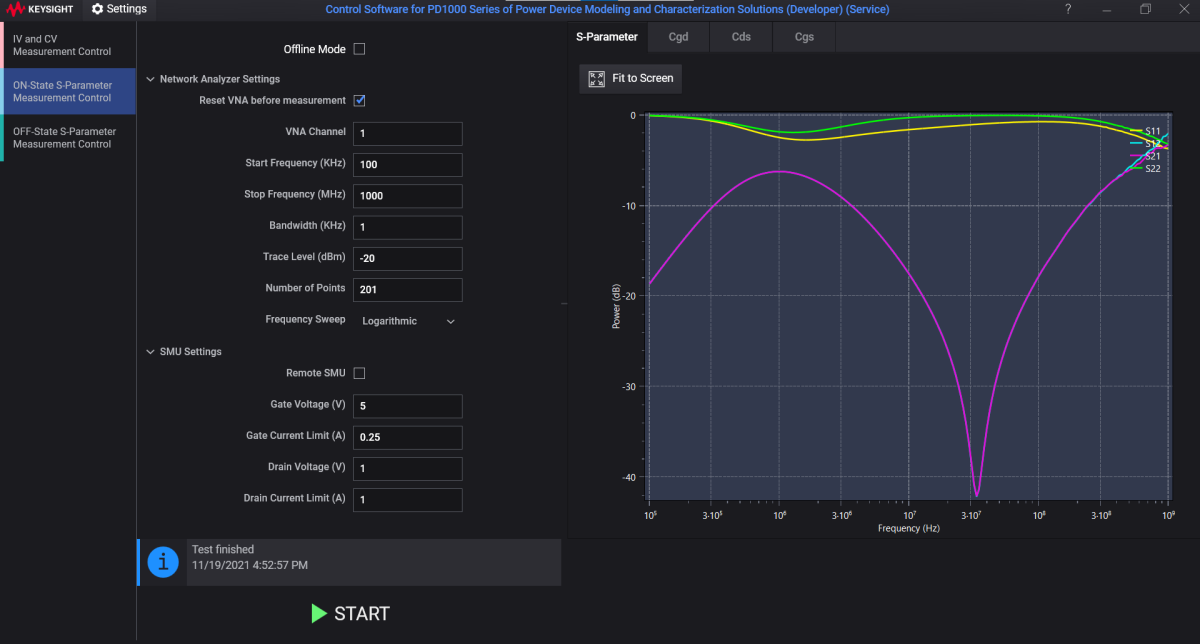
- The measurement is performed. The results are quickly shown on the E5061B screen. After a few seconds, measurement results are uploaded and shown on the PD1000A software. Just like E5080A/B, you can see calculated Cgd, Cgs, and Cds on the screen in addition to s-parameter measurement results.
- Select SMD 50ohm soft key
Typical Screen Shots of the E5061B and PD1000A.
SCT2080, Vgs = 0 V, Vds = 0 V, S-parameter vs. Frequency

SCT2080, Vgs = 5 V, Vds = 1 V, S-parameter vs. Frequency

SCT2080, Vgs = 5 V, Vds = 1V, Cgd vs. Frequency